Pages

Thursday, July 26, 2012

Customized Night Lights

A few years ago I saw some altered night lights in a magazine.  I hunted them down and made a few and loved them.  My mom asked me to make 15 for her one year and she gave them to all her friends for Christmas.  On her recent visit, she asked me to make her some more.  So I did.


These are SUPER easy to make and so fun too!  It just takes a piece of single-sided patterned paper and some trim.  The night light shades are self-adhesive so it goes together quickly and with minimal supplies.  If you wanna be really frugal, you can buy your trim in large cuts with a coupon or wait for them to go on sale at Hobby Lobby.  I usually use red tape for the trim but hot glue works well too.  I have an order  in for a few more.  I am thinking my office needs a Zebra stripe one with some pink gems.  What do you think?  ;)
Photobucket

Tuesday, July 24, 2012

CHA fun with Want2Scrap

Hello friends! What a whirlwind month July has been! I began by traveling to Atlanta for the Scrapbook Expo show on July 4th. It was a fun show and since I stayed with my friends Joyce and Larry, I had an even better time! They are always so gracious and I love having that little time with them. I returned home on the 8th and worked all week on Button Farm Club billing and shipping and hit the road again on the 13th for the Heirloom Stamp Show in Grapevine, TX. The BEST part of that show was my 3 hour trek through Ikea, but more on that later. ;)

After leaving Grapevine, I made a quick pit stop at the office then headed off for Chicago! I attended CHA this year with Scrap-Mart.com's new company, FarmHouse Paper Company. It was our official debut and FarmHouse was a bit hit. I have pics and some more updates for that later as well.

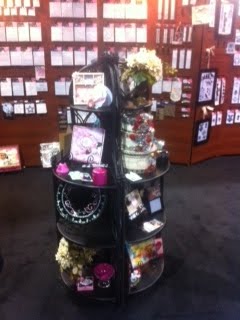
What I really wanted to share with you was that some of MY projects were displayed in the Want2Scrap booth at CHA! If you are not familiar with Want2Scrap, you are really missing out! They manufacture quality chipboard albums, bling and laser die cuts! Super fun stuff. Here are a few pics from the booth...


This is me with the owner, Michele. She is the sweetest person I have ever met. Just love her. Michele and I met on the road...Want2Scrap also travels to some of the same conventions Scrap-Mart attends.


This is a picture of the display where the majority of the samples were shown. Can you spot any of mine?? hehe


And here is a close-up of my 2 favorite projects that were displayed. Want2Scrap has a fabulous design team and they post new projects daily on their blog. Be sure to stop by and check them out! While I had a blast on the road, I am glad to be home. I have lots of work to do...and by work I mean play! :) hahaha Photobucket

Thursday, July 5, 2012

New hobby!

Hi all! My mom was visiting for the month of June and I mentioned to her that I would like to learn to make jewelry. She told me she would buy some stuff and be my guinea pig. Sa-weet! So we picked out some stuff and over the few weeks I set to work brining it all together for her. My first creating was this turquoise necklace for her...
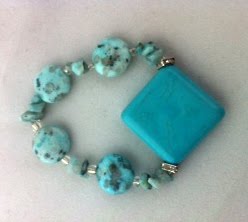
Sorry for the darker photo, I took it with my iPhone and tried to edit it. I ended up making some earrings and a bracelet to match too. Here's the bracelet...
She found some more beads she liked and I made this for her too...
Beading is pretty fun but I can already see how it can get out of control, like my paper crafting! hahaha Everytime I get dressed I think "oh, I should make a necklace to go with this". Sigh. I think I am in trouble. ;) Photobucket

Tuesday, July 3, 2012

DIY 4th of July tee

I had a friend call and ask me what she could do to turn a little white tank into a 4th of July tee for her little girl. My answer: bring it to me! haha I had a few ideas swirling around in my head and of course, rhinestones were involved. And whenever I think of rhinestones I think of my Gazelle. When Jennifer arrived we tossed around some ideas, made a decision and set to work. Here's the tank before we got started...
We decided to airbrush some stars on the front to start so we chose the B29 Copic marker and cut out some plain star shapes. I cut out 3 stars and placed them on the tank with some low tack adhesive. This way, I could place the negative over the star and know I was airbrushing in the correct spot! Before I started, I tucked a piece of chipboard inside the tank to keep any color from bleeding through.
Once I was done airbrushing all 3 stars, it was time to BLING it out! I grabbed my Gazelle and created a rhinestone template for U, S and A. Since we had blue stars and a white shirt we chose 6ss red stones.
I acidentally forgot to place my shield when spraying the last star and I oversprayed some. Big mess so we decided to make the bow to cover my oops. Here's a closer view of the rhinestones...
Didn't take long to pull together and Jennifer was happy with the results. And I'm sure I don't have to tell you her daughter looked adorable in it. I hope you all have a Happy 4th of July! We are celebrating tonight and tomorrow I am hitting the road for Scrapbook Expo in Atlanta! Photobucket

Thursday, June 28, 2012

Introducing FARMHOUSE PAPER COMPANY!!!

Hello friends! I am super excited to introduce you to a brand new paper company, Farmhouse Paper Company! The masterminds behind this company are a collaboration of some of my favorite people: Scrap-Mart and The Button Farm! Here are a few sneak peeks of the first product lines, which will be debuting at CHA Summer in just a few weeks. It is called Market Square...


Check out the Farmhouse Paper Company website and be sure to sign up for the newsletter so you can get all the updates! You can also find us on Facebook and "like" us there for updates and more sneak peeks! Photobucket

Wednesday, June 13, 2012

Scrap-Mart: Project Kits from The Button Farm

Today's my day on the Scrap-Mart Blog and I am showcasing an adorable little baby girl album from The Button Farm. Hop on over for the details and more pics! Photobucket
Tuesday, June 5, 2012

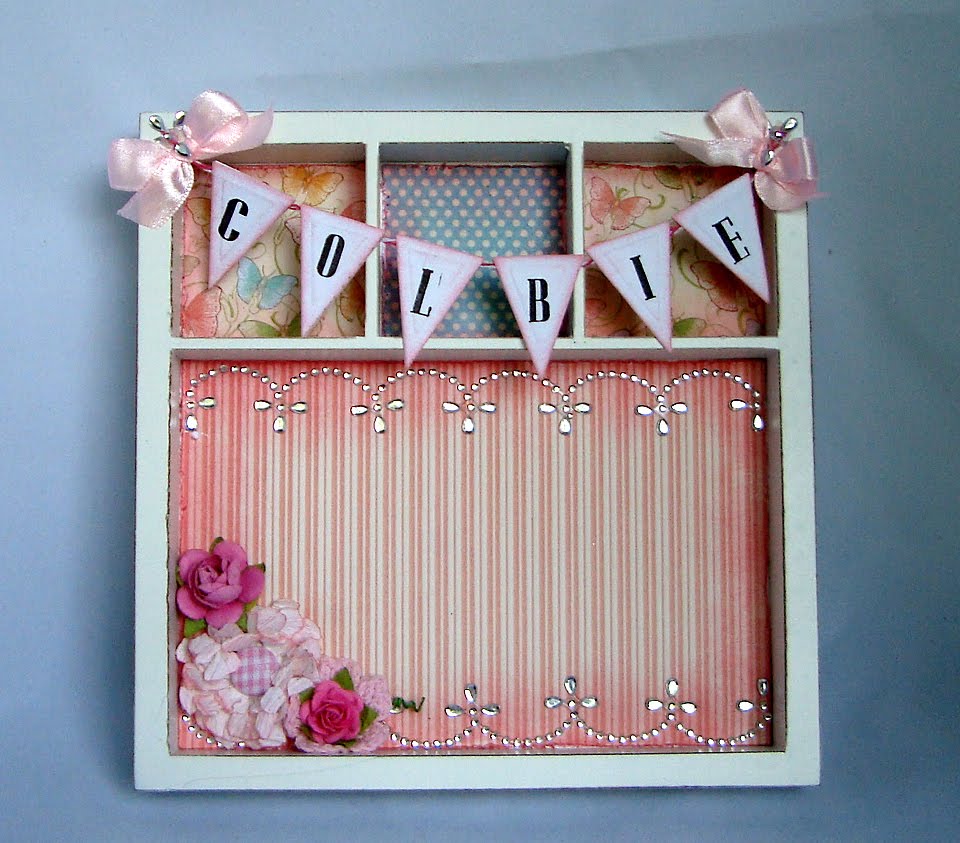
Scrap-Mart: Welcome Baby!

It's my turn on the Scrap-Mart blog again! Hop on over for the details and products used to make this fun mini printers tray...
Photobucket